3.2 - Pre-Survey Mapping Detailed
This tutorial will show you some usage of basic QGIS functions in a little more detail. Here you will learn more about how to digitise features as well as best practices to ensure the features are accurately drawn.
What is Digitising?
Digitising is a term used in GIS for creating a vector data set that represents a real world feature. Vector data-sets are useful in that they allow the computer to easily calculate geometric attributes such as area or length.
Creating a Layer
In the GIS classes of this course, layers will already be created for you ready for digitising.
In this tutorial, however, we will create a Temporary Scratch Layer  for practicing.
In QGIS, navigate to Layer > Create Layer > New Temporary Scratch Layer…
Change the Layer name and the Geometry type to the type of layer you would like to create.
Adding Features
To begin digitising, click once on the layer you want to edit from the Layer Panel. A blue layer means it is selected.
Click on the yellow pencil  on the Digitising Panel to Toggle Digitising Mode - aka editing mode.
Once you are in digitising mode, the Add Feature icon will become available. Depending on the geometry type of the temporary vector layer you have created, this will look slightly different.
| Add Feature Icon | Layer geometry type |
|---|---|
 |
Point, MultiPoint |
 |
LineString, MultiLineString |
 |
Polygon, MultiPolygon |
To digitise, left click to place a node. Move the mouse and left click again to add another node.
If you have made a mistake, press Backspace to remove the previous node.
Once you have finished the feature, right click to complete the geometry.
Save Layer Edits  to commit the changes to the data source.
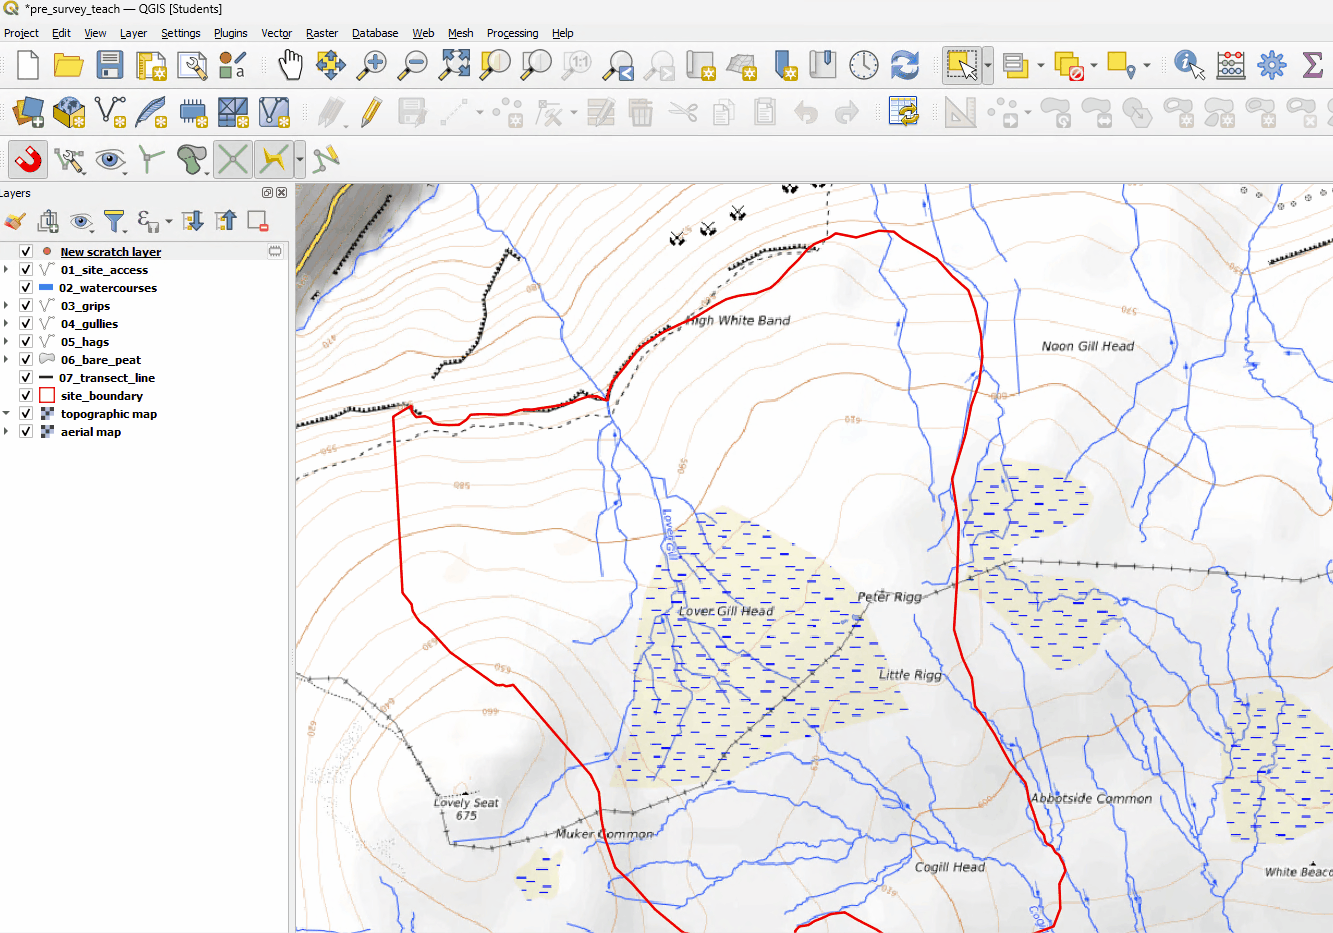
This is an example of a line feature being created.

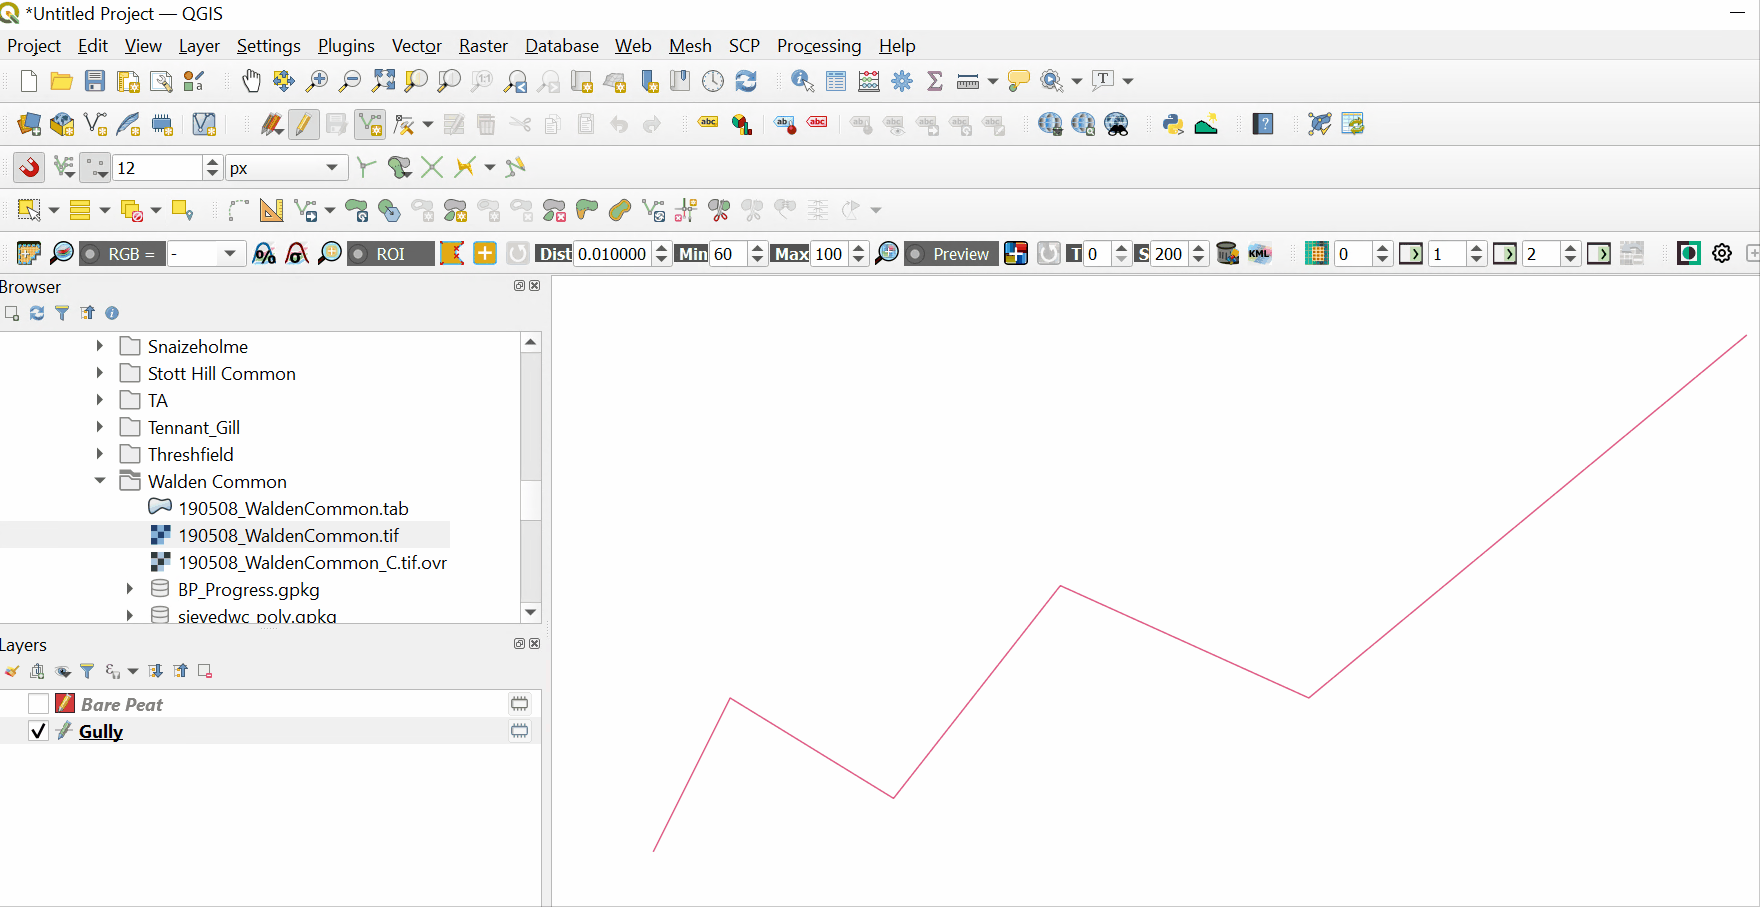
This is an example of point features being created.
Snapping
The QGIS Snapping tool can be used to create features that connect to each other, to increase the accuracy of edits.
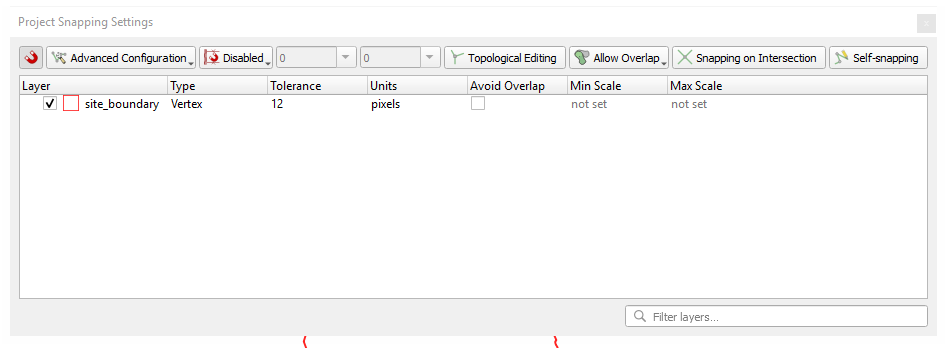
To turn on snapping, navigate to Project > Snapping Options… > Enable Snapping (S) 
Turn on All Layers  , Vertex
  .
.
Click on the yellow pencil on the Digitising Panel to Toggle Digitising Mode.
Hover over the vertices of the layer you would like to snap to. It should show a purple box.
Left click to begin snapping and adding to the Temporary Scratch Layer .
Tracing
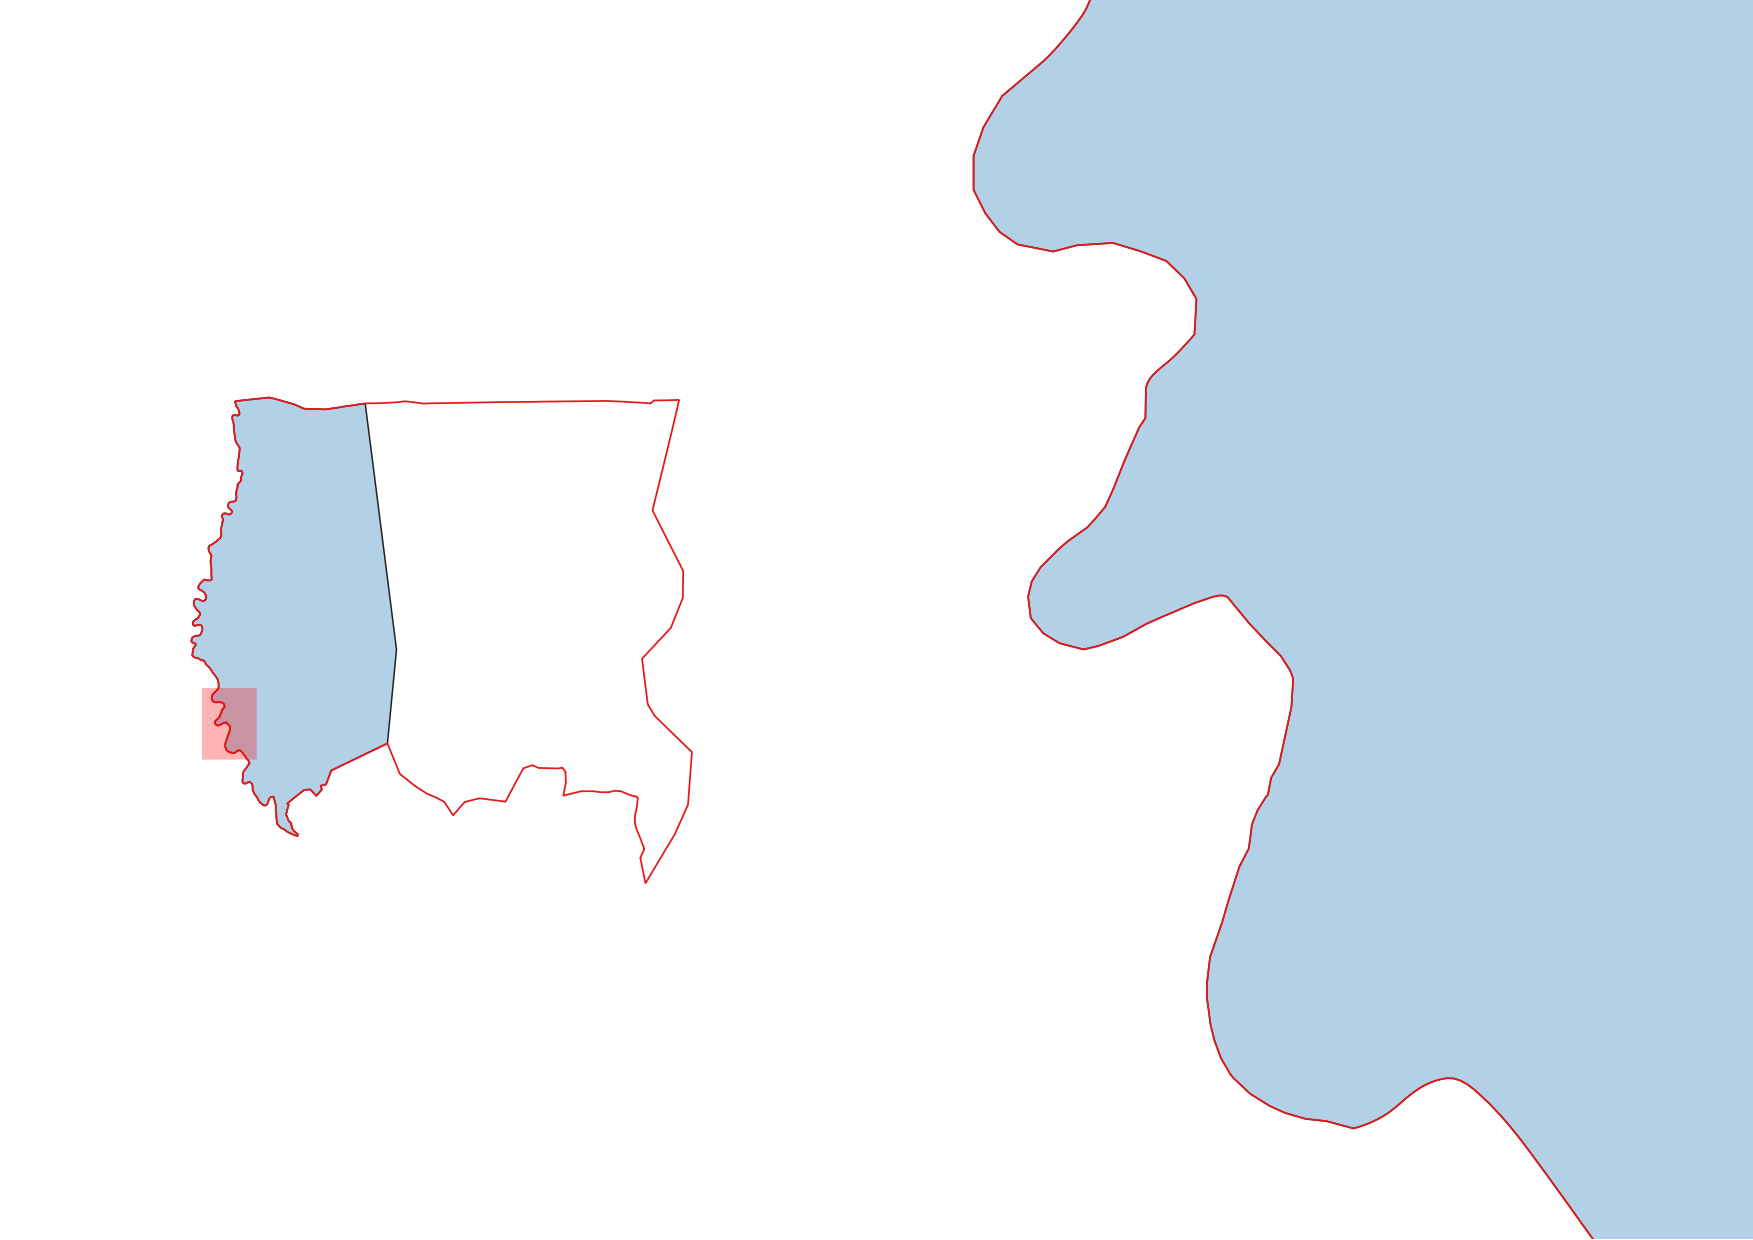
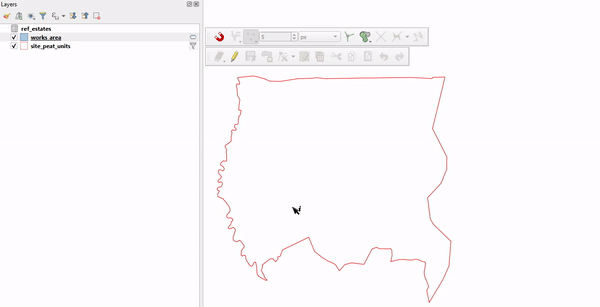
Accurately matching features such as site boundaries can be challenging.
It is tedious and time consuming to make sure you snap to every point on a feature and inevitably, you may end up with something looking like this:
As you can see, there are a lot of gaps and the overlap between features are called ‘slivers’.
Gaps and slivers must be avoided, as this may result in implications for calculating areas correctly.
QGIS provides an excellent tracing tool which automatically snaps along the shortest path, ensuring that there are no overlaps or gaps.
Select Enable Snapping (S), click on Open Snapping Options and navigate to Advanced Configuration  in the Project Snapping Settings to turn snapping on for your desired layer.
Select the Enable Tracing (T) tool  , Toggle Editing and select the Add Polygon Feature (Ctrl+.) to begin tracing the site boundary.
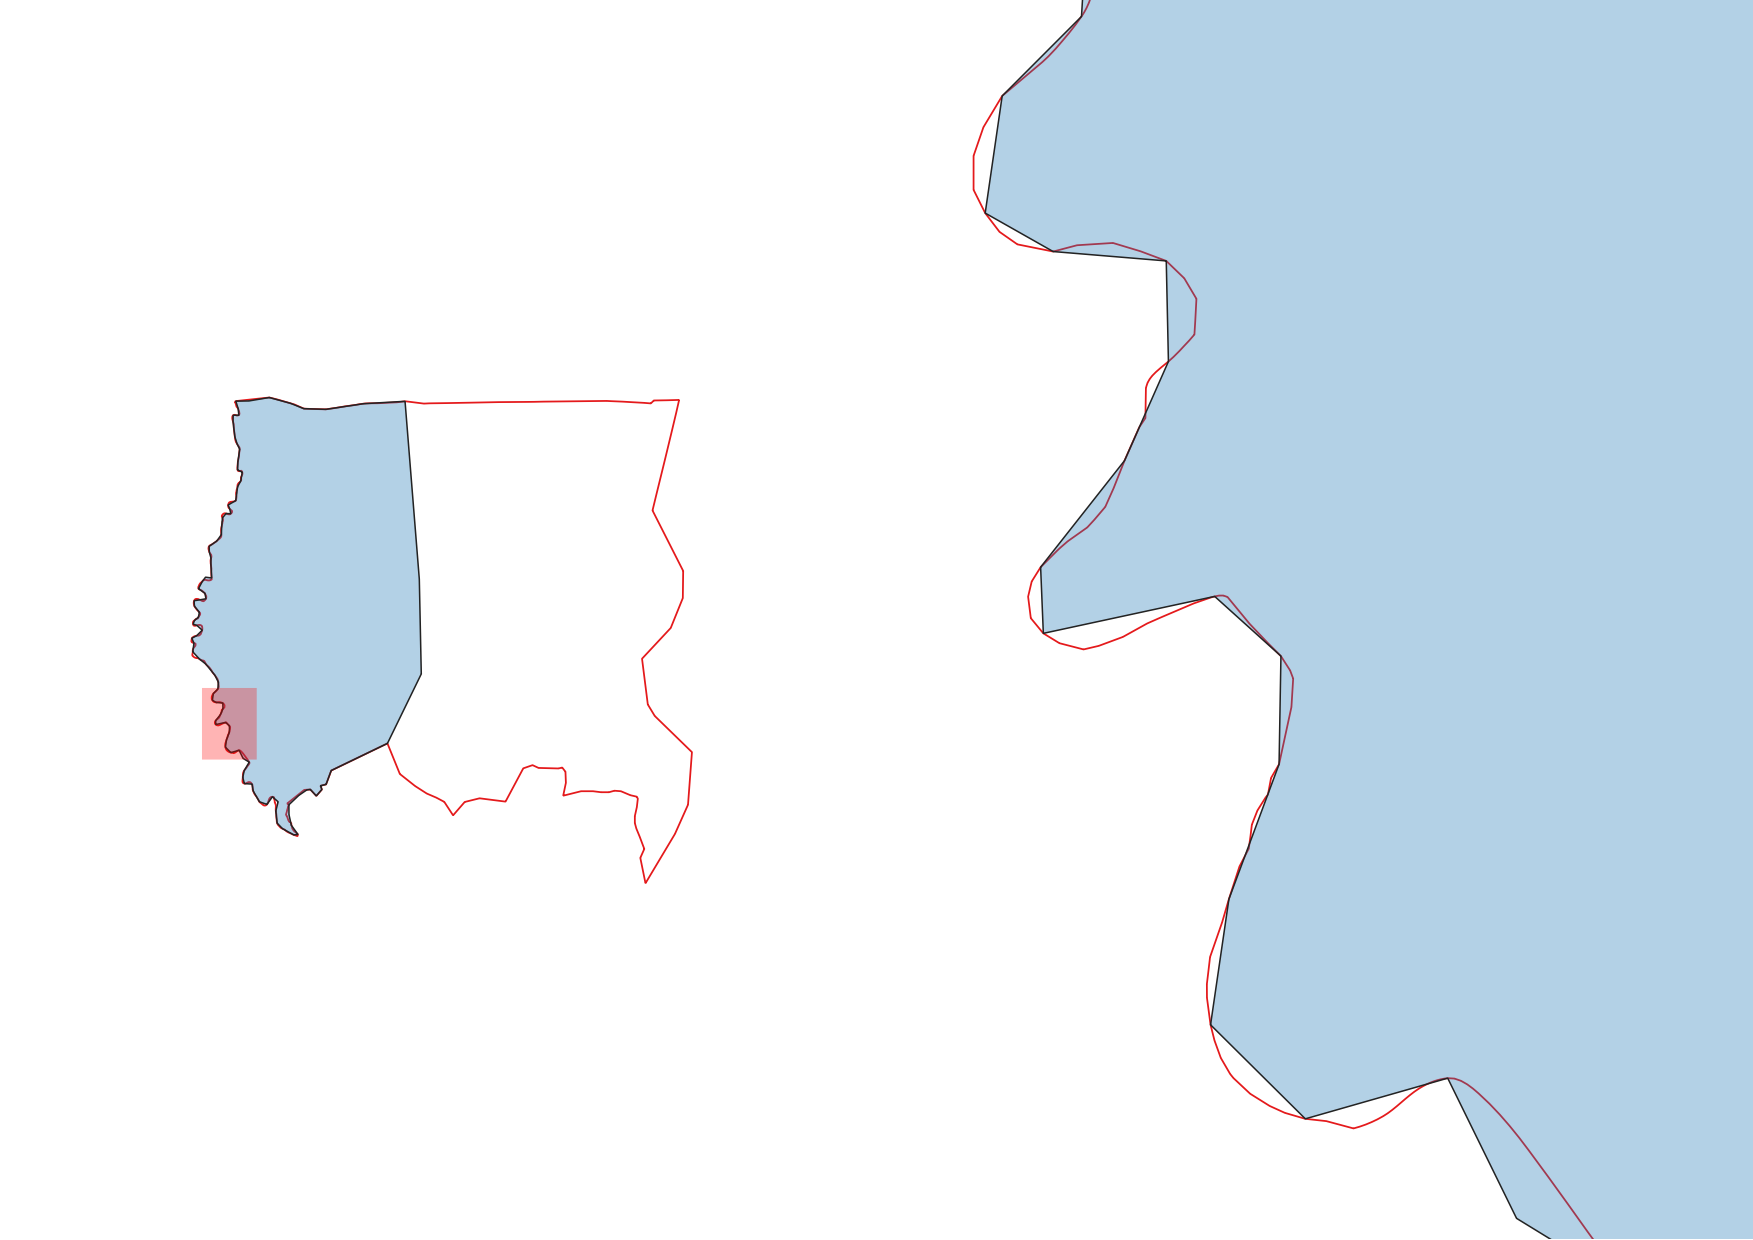
Now you should have topologically correct boundaries: